Back to workshop stories
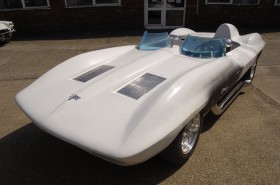
1959 Stingray Racer
The precursor to the 1963 Sting Ray, The XP-87 would later become known as the Stingray, and after a brief racing career would become head of GM styling Bill Mitchell’s personal car.
This stunning roadster is as rare and valuable as they come, and along with the Mako Shark and Manta Ray are, in my opinion, at the absolute pinnacle of Corvette styling.
In the 1960’s US firm Fiberfab produced a body based loosely on the Stingray racer known as the Centurion. My dad had often spoken of a Centurion body that he had known about for some time and had always fancied one. At the time our customer Tony was keen on us building him a Concept 57 project car with modern running gear. Dad showed him a picture of the Stingray racer and mentioned that we may be able to get hold of the body and take a mould off it…..
And here we go!
-
11th Jul 03
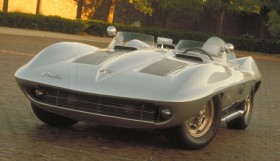
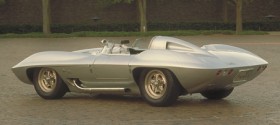
The original XP-87 Stingray racer, one of one and priceless.
-
-
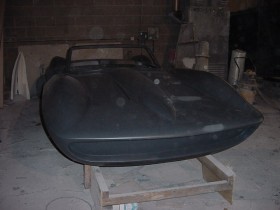
12th Jul 03
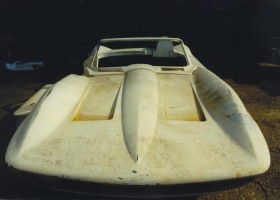
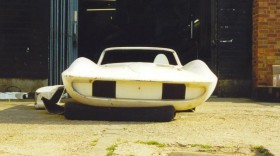
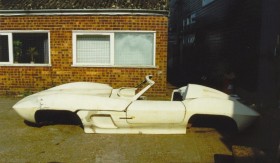
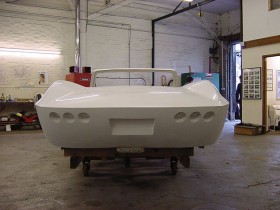
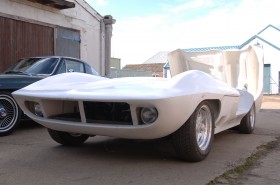
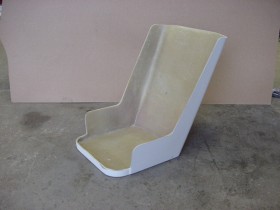
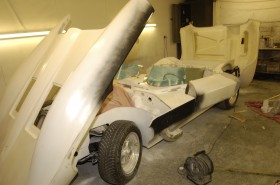
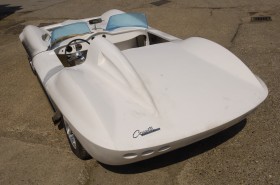
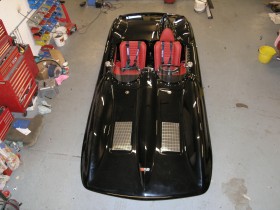
Our start point. This original Fiberfab body had lain outside for many years and was in very poor condition.
-
-
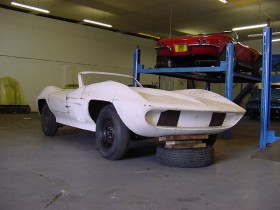
18th Jul 03
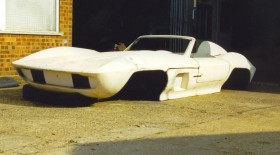
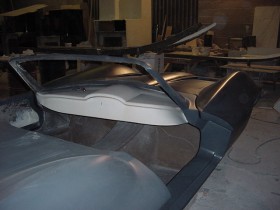
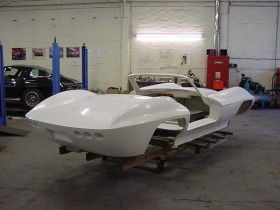
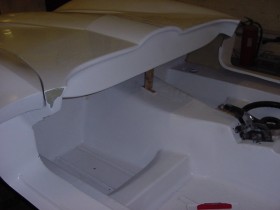
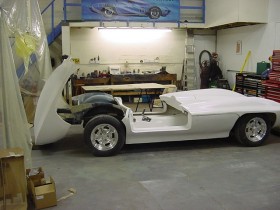
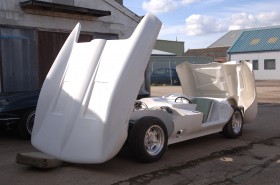
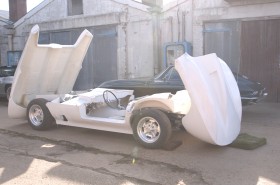
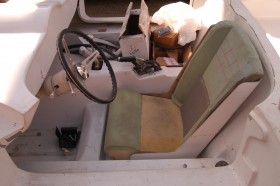
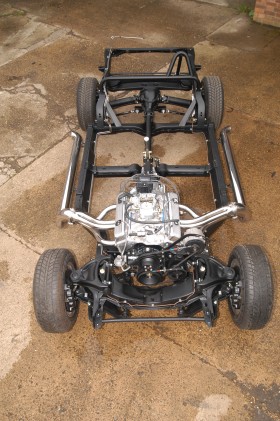
Here the body is laid on a chassis to get an idea of what it might look like and to try and figure out where to start. This body had never been mounted before, there we're no mounts, no floors, no holes cut for a steering column, brakes, pedals, or any other fitments.
-
-
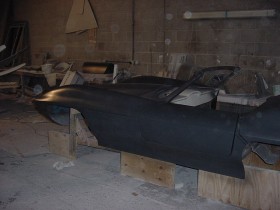
3rd Nov 03
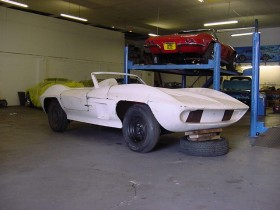
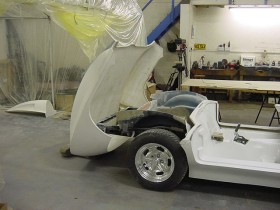
The body was set up and levelled and then work began on prepping the body for a mould to be taken. This included separating the rear bodywork so that the rear clamshell could open as well as the front. On the Fiberfab cars this was fixed.
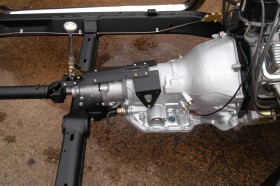
This also involved making the buck for the floorpan. We started off by cutting the transmission tunnel out of a 1973 breaker and smoothing it out so the transmission tunnel could remain exposed and painted.
-
-
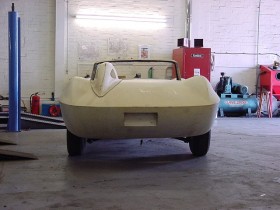
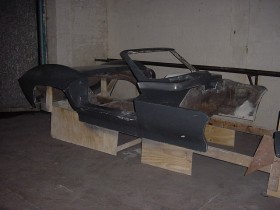
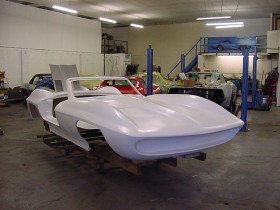
26th Mar 04
The first body out of the mould. There had been an awful lot of hard work to get to this point. Note the recesses that have been added to take the tail lights.
-
-
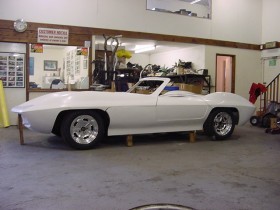
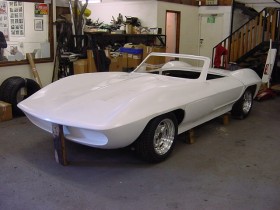
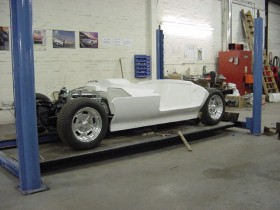
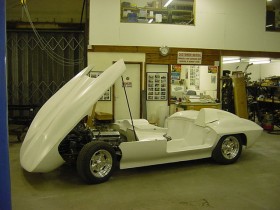
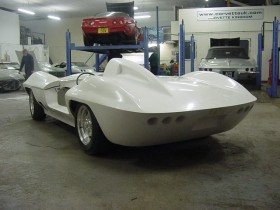
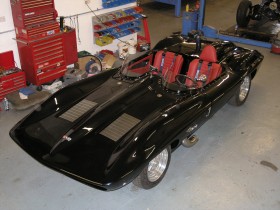
27th Mar 04
The new body sat on the chassis for the first time.
-
-
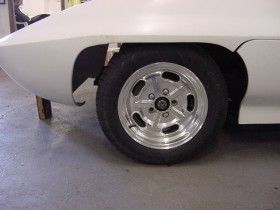
7th Apr 04
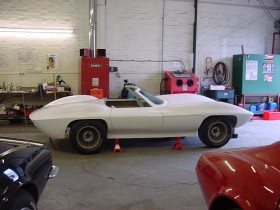
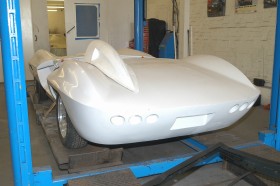
The new American Racing Salt Flat Special wheels, these are very close to the Halibrand magnesium wheels used on the original car.
-
-
10th Jun 04
The first video showing the body, floors and trunk area.
-
-
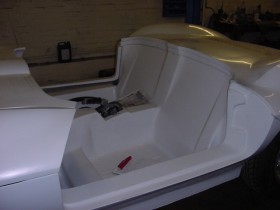
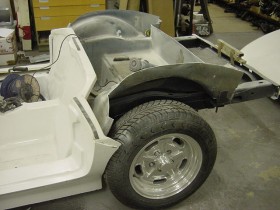
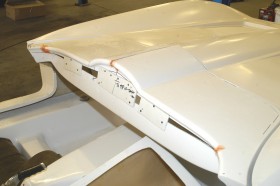
19th Oct 04
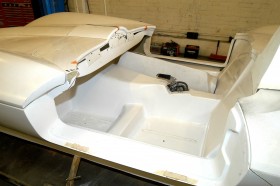
The modified cowl to accept areoscreens instead of the full windshield. These photos also show the detail of the new floorpan and transmission tunnel/rear bulkhead. The floorpan was lowered so the driver looked like they were sitting in the car rather than on it.
-
-
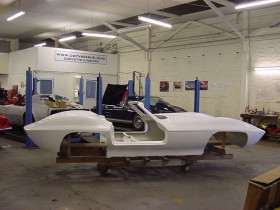
25th Nov 04
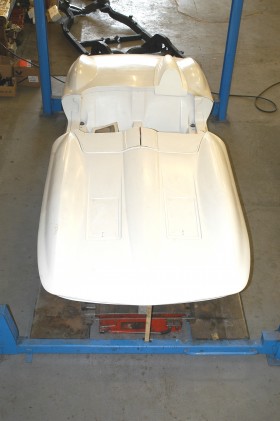
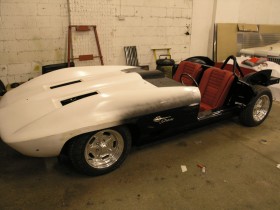
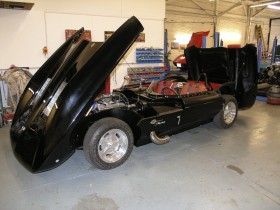
Finally the floorpan and outer body shell bonded together and bolted to the chassis. The engine had been temporarily installed and the centre, front, and rear sections trial fitted over and over to finalise the overall body height. It was important to try and get the body to sit as low as possible to give the car a sleek low slung appearance but also maximise clearance for the engine and all its ancillaries. Steel runners were made to fit under the floor to bolt to the chassis just like a real Corvette, it would also give us fixing points for a birdcage.
-
-
3rd Dec 04
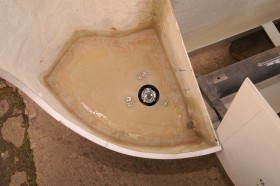
We started work on the buck for the rear storage compartment. For this we cut the rear out of a 1980 and modified it to fit, we took a mould from this to make the real panel.
-
-
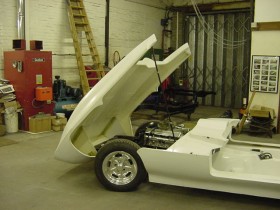
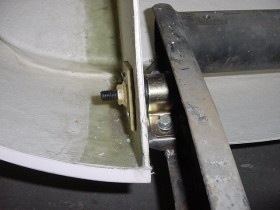
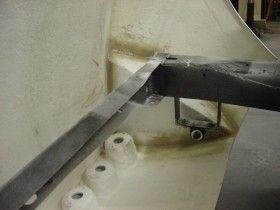
9th Dec 04
The next milestone was to develop the front clam hinge. We experimented by using a Corvette sway bar mount and made a bushing to suit and a retainer riveted to a fibreglass panel bonded to the front clam. This worked exceptionally well and was smooth and effortless, so we stuck with it.
-
-
23rd Dec 04
We used the same method for opening the rear clam, This required a right angled moulding to be made for the pivot plate to mount to. Once again we made a mock up then took a mould off it so this corner reinforcement could be made as a single piece. Not only would this be stronger it would also give the car a more finished look.
-
-
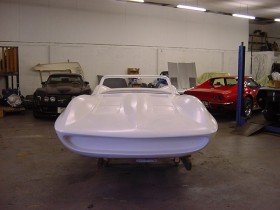
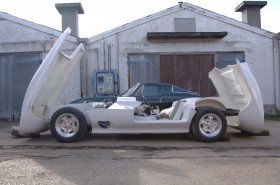
18th Apr 05
And this is what is was all for….The opening rear was a big bone of contention between me and my dad, I was all for keeping it simple and he was all for having it open, the extra work involved was of no importance, it had to open because it would be cool, of course he was right!
-
-
19th Apr 05
This is a shot of the front inner fenders. It was important to me that these were smooth on both sides. Obviously we couldn't go to the expense of press-moulding them so two very thin opposing panels were made which were bonded together.
-
-
20th Apr 05
This video shows the front and rear clam hinges and opening, also the steering column, seat, and pedal box.
-
-
21st Apr 05
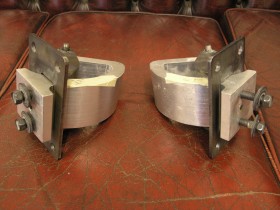
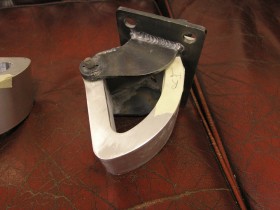
To mount the headlights we cut the mount lug panel out of a 68-82 headlight lid and let it into a flat sheet of fiberglass and took a mould off it. This enabled us to use Corvette headlight attaching points and add an extra reinforcement to the front hinge panel.
-
-
22nd Apr 05
The first dash/cowl moulding really didn't work very well and needed some remodelling to get the line from the hood bulge to flow nicely into the bulge on the dash piece. A fresh mould was made and the original dash section was cut out and a new one let in.
-
-
21st May 05
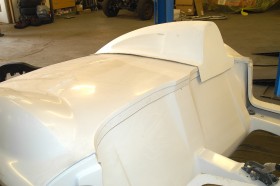
The headrest was a separate moulding that had to be let into the rear deck.
-
-
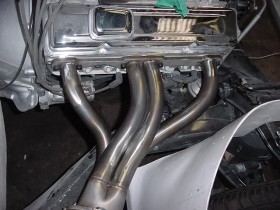
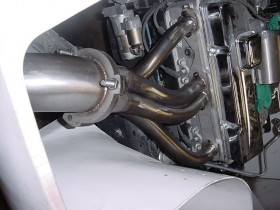
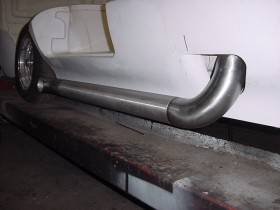
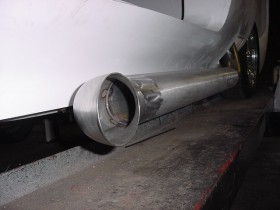
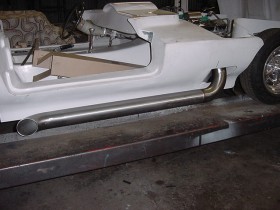
11th Jun 05
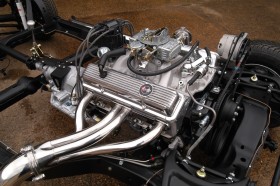
We sent the car to a stainless steel specialist to have the exhaust system fabricated to our design. We used a Hooker Header glasspack muffler and had the exhaust system made around it using a slip joint at the front so the muffler could be changed when necessary. I seldom see a custom made exhaust that I am impressed by but this was truly a work of art!
-
-
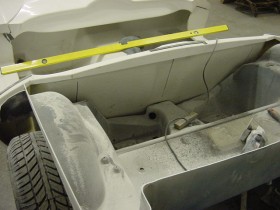
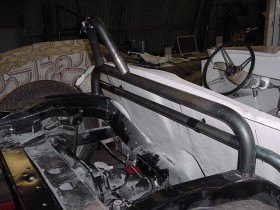
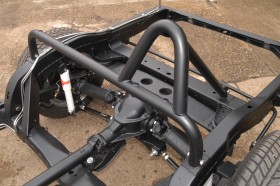
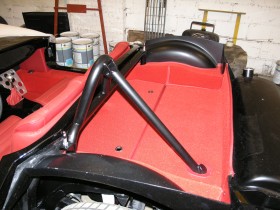
12th Jun 05
We used the same guys to make the roll bar that sat inside the headrest, this had a male/female socket fixed directly to the chassis so that the rod bar could be removed should the body need to come off. Note the birdcage structure taking shape around the cockpit.
-
-
13th Jun 05
This birdcage also doubled up as the mount for the steering column and pedal box,. and also as a support for the custom made door hinges, all in billet aluminium.
-
-
16th Jun 05
This shows the windshield mounting, we had these welded out of aluminium to really give this a race car look. Note the slots in the rear bulkhead for the seat belt harnesses to come through.
-
-
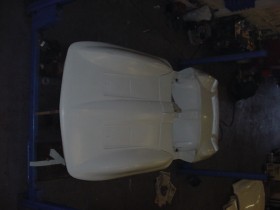
18th Jun 05
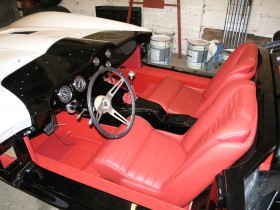
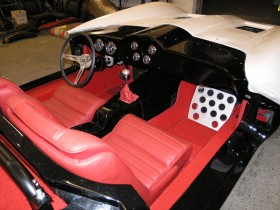
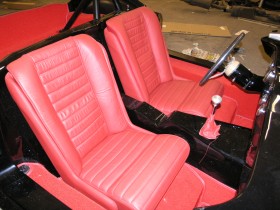
A seat former was constructed out of MDF and then a fibreglass mould made so the seat could be made in one piece. Some foam was shaped to get an idea of what the seat should be like. New foam was used in the actual seats….Along with heated seat pads.
There is no adjustment on the seat or pedal box, the seat was installed and Tony came for a fitting, then the pedal box and steering column were installed to suit him. Thats custom made baby!
-
-
30th Aug 05
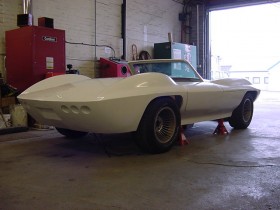
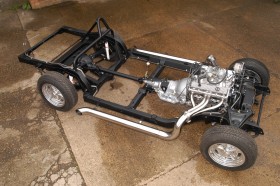
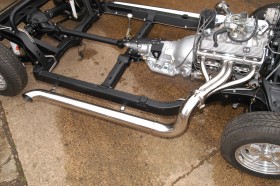
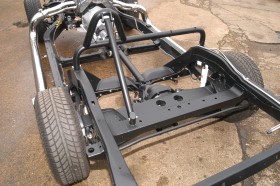
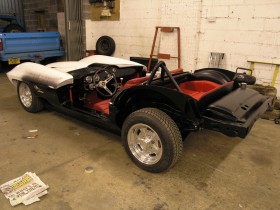
So by now the bulk of the messy work was over, the endless fibreglass grinding and laminating had pretty much come to an end. We had a good idea of where everything went and how it was all going to fit together. Now the body could come off for the last time and the chassis painted and built up with new suspension and brakes, new fuel and brake lines, the usual CK body off. Looks magnificent!
-
-
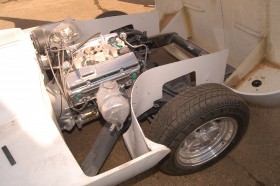
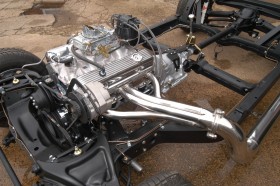
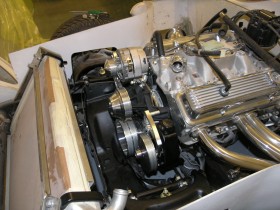
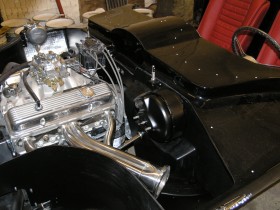
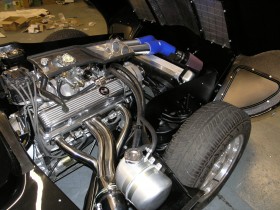
28th Feb 06
Once the body was back on we were able to fit the billet aluminium serpentine belt system, aluminium LT1 valve covers and DeWitts aluminium radiator with twin cooling fans, how lovely!
-
-
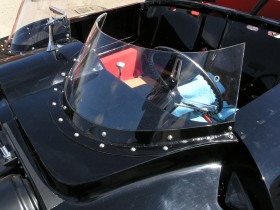
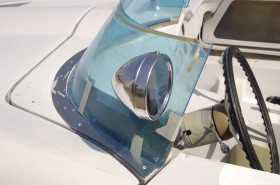
4th May 06
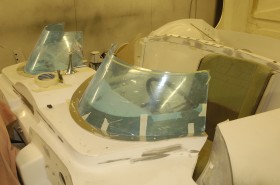
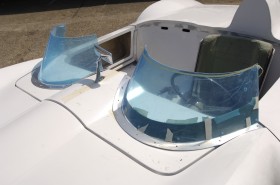
Now those windshields…..You have no idea how much work went into those windshields…
It all started with the owner sat in the car to get the overall height required, several mockups were made to try different heights and angles of rake. Once we had decided on the final shape we made a former out of MDF, this was fibreglassed over for strength, and then given a coat of body filler. This was blocked flat and then primed and wet flatted
until perfectly smooth.
Once the mould was complete a local plastics firm heated a sheet of acrylic over the mould in their oven and the windshields were formed. These were trimmed to our pattern and the holes drilled for the side mirrors.
The windshields really came out well with no distortion when looking through them. A lot of work but well worth it.
-
-
5th May 06
This is the final mock up and trial fit before the body was removed for the final time so the undercarriage and engine bay could be painted satin black.
-
-
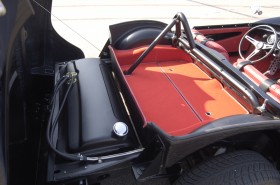
24th May 06
The centre section painted and installed on the chassis.The gas tank is from a 1932 Ford!
-
-
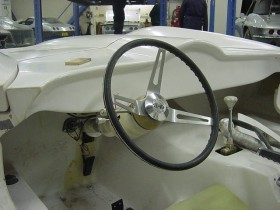
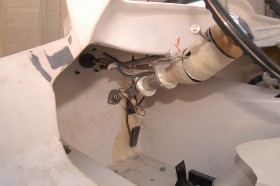
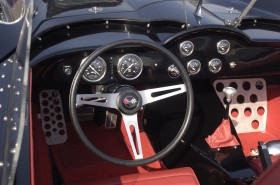
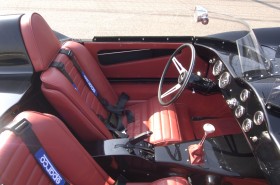
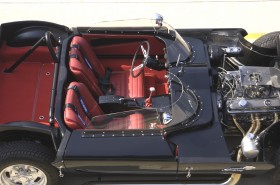
25th May 06
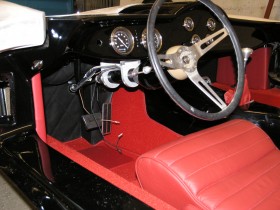
Close up of the steering column and dash area. Note the quilted firewall cover.
-
-
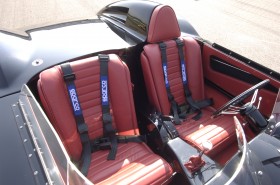
30th May 06
The boot and interior fully upholstered. The car was trimmed in 1957 Daytona weave carpet, this has always been my favourite Corvette carpet. The seats were upholstered in red leather and fitted with heat pads for driver and passenger. Note the perfectly painted transmission tunnel. I got a real kick out of that!
-
-
3rd Jun 06
We also made a mould for a smooth firewall cover, this also served to extend the drivers footwell for pedal clearance. Note the heat resistant fabric on the inside of the fenders.
-
-
15th Jun 06
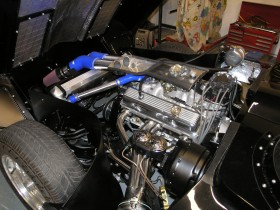
Really starting to take shape now. These pictures show some of the workings of this car, particularly the air cleaner tray that fits against the underside of the hood.
-
-
22nd Jun 06
The night before the CCCUK Nationals in 2006, this was to be the first time that Tony would see the car in a finished state.
-
-
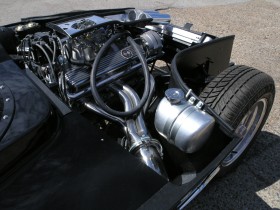
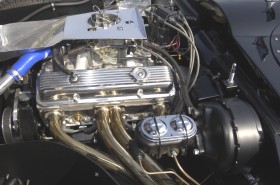
22nd Jun 06
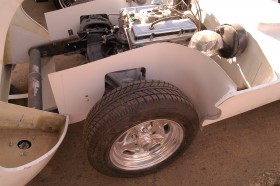
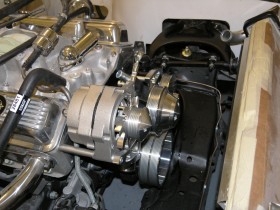
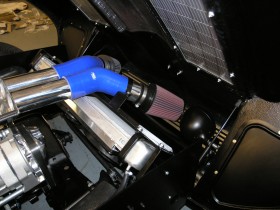
Shots of the completed engine compartment. The underside of the hood forms the upper part of the air cleaner and so was trimmed with heat resistant material. I never liked the blue hose but at the time I couldn’t get black…..
Note the splash panels over the front fender bulkhead, this was given a beaded edge so it had more of a production car look about it, one of many tiny details that sets this car apart from the usual one off build.
-
-
22nd Jun 06
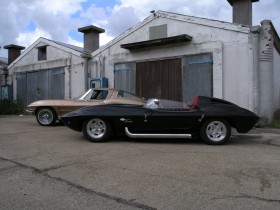
Parked next to my friend peters 63 coupe. This shows just how low the car really is.
-
-
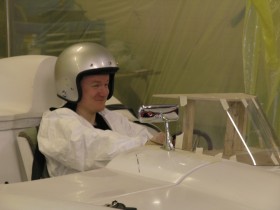
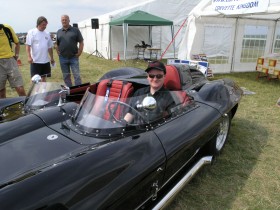
23rd Jun 06
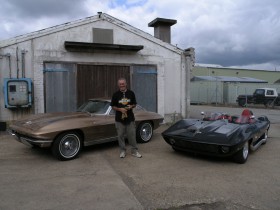
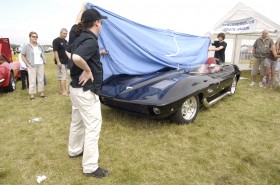
Tony getting to see his car for the first time. Can you imagine how that must have felt!
-
-
11th Jul 06
And it lives……
-
-
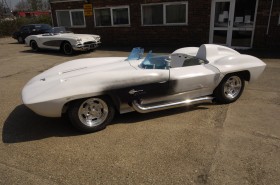
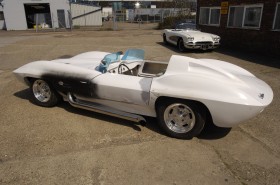
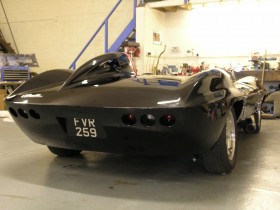
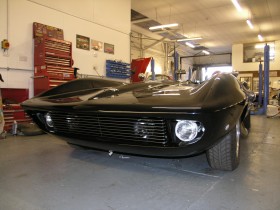
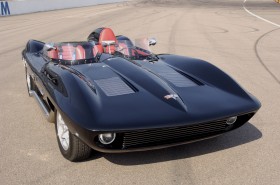
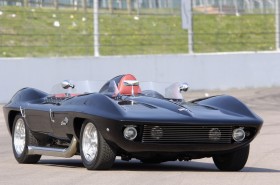
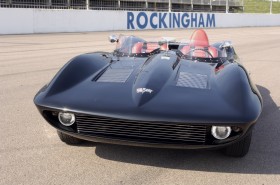
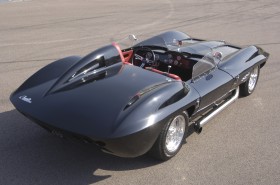
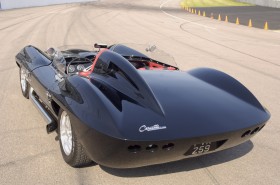
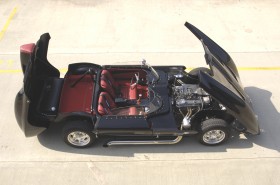
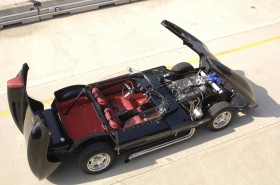
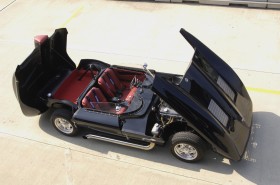
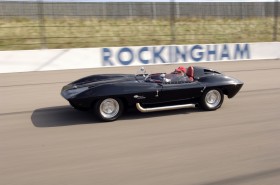
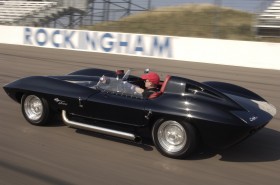
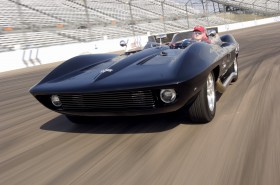
11th Sep 06
And there it is…On the photoshoot at Rockingham Raceway. The car looks fantastic from every angle and is a real blast to drive.
-
-
30th Sep 06
This was a difficult build in many ways. It was very time consuming and nothing was straightforward. The end result though was absolutely stunning and very well finished throughout. Tony was the perfect candidate for this project, he understood fully what was involved in building a one off car where the focus is on build quality rather than cost.
It was my dad Ray’s pet project, it was his idea at the very outset and his enthusiasm for the project was a real boost when things weren't going well. There is no doubt that without Ray Groves, this car would never have existed.
Dad was diagnosed with cancer in late 2004 and quickly became too sick to visit the workshop. I would take videos of racer progress to show him and his eyes would light up each time he looked at the tapes. Seeing his reaction to these videos was truly a pleasure.
Dad passed away in February 2005 when were only a third of the way through the build and never got too see the finished article, but he did get to see that f*****g rear clam open, which he liked….
I’m very proud of this car, It will always be the special one for me because of the connection with my dad, and also because it is so cool! I have seen lots of kit built cars and one off builds, and I’ve been impressed by very few, this car was well thought out and was built to a high standard with a great deal of care and attention to detail. It was important to me that the racer would never be looked upon as a kit car or home brew. I think we achieved that and then some.
And if you fancy one I’ve still got the moulds…..
-